Wednesday, August 31, 2011

Basic Cloud 9 - The Challenge


Miscellany by Julia Rothman

I along with 11 other brave souls have been randomly selected to create a block from Miscellany by Julia Rothman.  From the twelve blocks Julia Rothman will judge the blocks and select a winner who will receive a fat quarter bundle of Across the Pond by Michelle Engel Bencsko.

All twelve blocks will be made into a quilt for Bumble Bean's Basics Quilt Drive.  Victoria (aka Bumble Beans) is trying to collect 400 quilts by 11/24/11.

Wish me luck!  After looking at my competition I have a feeling I'm going to need it.

Tuesday, August 23, 2011

Back and Rested

Is it just me or does going to a quilt retreat wear you out too? 

I am guessing that going to bed at 2 AM and getting up at 8 AM every day might have something to do with it.  Upon arriving home Sunday afternoon, I fell into a nap induced coma for a few hours.  And Monday wasn't any better.  I was up at 8 and taking a nap by Noon.

I wish I could say that my exhaustion was due to accomplishing a lot but alas...I can't.  I spent most of my time working this and that, eating lots of good food, laughing with friends, and just being an all around laze about.

Here are a few of things I did manage to work on during my three and a half days away.


This little quilt is made from two Tula Pink charm packs,
a bit of background and CS Designs' Lil' Twister tool.


I worked a little on my redwork basket.


I participated in a jelly roll race...and didn't win.
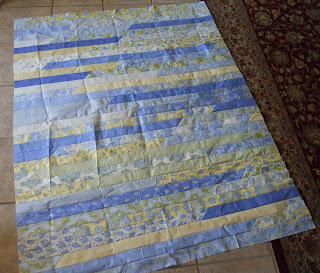
I probably should have pressed this before sharing...ya think?


I decided on the star layout for the triangles in my last post. 
It was first and favorite layout.  I can't wait to see this one finished.


I also managed to work some more on my spiderweb quilt but somehow managed NOT to take a photo.  How does that happen?  Too many distractions I guess.  Here are a few photos of what some of the other ladies were working on.  


Lee's Cheese & Crackers quilt


Jamie's sunflower quilt


and Jamie's tablerunner


Mazelle's


Connie's Silent Auction quilt for our upcoming quilt show


And Connie's work in progress


Debbie's Christmas quilt...soooooo cool!


Amanda's work in progress
Amanda was the baby of the group at almost 20 years old. 
She designed this at retreat and used a jelly roll to make it.


And finally...Linda's Ohio Stars from
History Repeated by Betsy Chutchian and Carol Staehle.


Well that's all I have for y'all today.  I'm off to machine quilt a couple projects.  See you tomorrow...hopefully!

Wednesday, August 17, 2011

Decisions Decisions!

So I've got all my scrappy triangles cut from this post.  I have been playing
with them to try and figure out how to put them together. 
And there are just way too many ways I can go! 

Here are just a FEW of my options...


Which would you choose?

Tuesday, August 16, 2011

Columbia Star Tutorial

At long last here's my tutorial on how to make your own Columbia Star blocks. 


First, I originally found this pattern on United Notions' website in their free patterns.  It was called Portobello Market and measured 81" x 97".  And as far as I can tell, its no longer available on their website but that's okay.  I have a pdf copy for anyone interested.


CUTTING & MAKING STRIP SETS

Before we start let's talk about LOF (length of fabric). According to the original pattern, you are cutting strips the length of fabric (parallel to the selvage) because will help minimize stretching. The original pattern called for 2" x 31 1/2" (WOF X LOF) strips which is long enough for two star blocks. And what I learned is that left NO ROOM for error. So cut your strips from 36" LOF and that'll give you a little room for squaring up and a miscut should that happen.

For each block you will need five prints.  
  • Round 1 (Center) - 1 strip 2" x LOF
  • Round 2 - 2 strips 2" x LOF
  • Round 3 - 3 strips 2" x LOF
  • Round 4 - 4 strips 2" x LOF
  • Round 5 - 5 strips 2" x LOF
Below is a picture of my strips laid out into five strips sets. 


Sew the strips in each set together staggering the 3/4".  Always press in the direction of the arrows.  They should now look like this.


CUTTING UNITS & MAKING SECTIONS
Next, from each strip set you will cut 12 units.  To start align the 60 degree line of your ruler with the bottom of your strip and trim off the uneven edge (first pic).  Then cut 2" strips, aligning the 2" mark on your ruler with the 60 degree edge you just trimmed (second pic).

Every so often its a good idea to make sure everything is still aligned correctly.  If not just trim your 60 degree edge again before cutting more strips.

After you have cut all your units lay them out like this and you are ready to start piecing them together. 

I like to piece mine working left to right, starting with strip sets E and D, and sewing from the center outward.  Lining up the pieces properly is the most critical part to a perfect star. 

Lay Unit D on top of Unit E, right sides facing as shown.  Lined up properly your 1/4" seam should begin where the arrow is pointing in the front view picture.  When you are looking at the two units from the back side, the seam of Unit D should meet the corner of Unit E.  (This rule applies when adding the other units too).


Here's another view of how they should line up.


Sew and press toward Unit D.  Continue adding the other units in the same manner and pressing toward the newly added unit.
 

COMPLETING THE BLOCK

When done you will now have 12 block sections.  Lay out six sections for one star block and sew them together from the center out, pressing in one direction.  If you've pressed all your seams in the right direction,  all your sections should butt up perfectly.


When sewing the two halves together I like to again sew from the center out and then turn it around and sew the other direction.  This helps to create a more perfect center.


See!

And when pressing the final seam, to reduce the bulk in the center and keep all the seams "spinning" in the same direction pop a few stitches from the back the first two sections were together for each half.  If you've done it right, it should look like this.


TRIMMING THE BLOCK

To trim your block align the 7 3/4" line of your ruler with the center of your block.  Trim the edges off.  Continue rotating and trimming each side in the same manner until all six sides are trimmed.


And you're done...with the block that is!


To set your blocks, cut 60 degree triangles from 8 1/4" strips and set like you would any hexagon quilt.


I hope y'all enjoyed my tutorial and will use it to make Columbian Stars of your own.  If you do, I'd love to see them! 

Please feel free to leave a comment with any questions you may have and I'll try to answer them in another post.  And don't forget to leave me a comment if you would a like a copy of the pattern I used to make this quilt.

Monday, August 15, 2011

Weekend Report

I didn't get a whole lot done.  *hangs head in shame*

It was a lazy weekend and we finally enjoyed some RAIN!  I think we got 2 inches at final count.  Normally by this time of year we have had around 6 inches.  So any rain right now is good rain.

Saturday I managed to work on two projects that I hadn't even planned to make.  The first one is a little quilt from the leftovers from my Witch's Boot.  I am making it for a friend for her birthday.  Right now its only 20" square.  I'm thinking it needs a small 1" beige border followed by a 1/2" orange and a 3" black border to finish it off.


Then from leftover ends from all the 60 degree triangles I've been cutting, I made this little 16" top.  I am thinking a premie quilt maybe.  The ends had so much left that it just seemed a waste to throw them away.


I don't know what it is but I just didn't feel like working on anything else this weekend.  And it's not like I don't have stuff to work on.  I have sample quilts and swap blocks that need to be completed.  My lack of "git r dun" attitude might have something to do with the state of my quilting room  I think.  It looks like it's been ransacked.  Which means its probably time to do a little tidying up.  But that'll have to wait till after I get back from quilt retreat this weekend.

Friday, August 12, 2011

OOPS! My brain has left the building...

I was supposed to pick a winner for the Traveling Stash yesterday!
I don't know where my brain was...is.

The newest recipient of the Traveling Stash is...


Sandie


Congratulations Sandy!
Send me your address and I'll mail the
Stash out to you today.

Tuesday, August 9, 2011

I'm almost sad...

...that its over.


Which Witch's Boot will go down as one of my favorite projects.  It was just so much fun
to do that my next stitchery will HAVE TO include coloring with crayons again.

Thanks to everyone for all your comments during the progress of this stitchery.  Your comments
kept me motivated to get it done faster.  I hope y'all enjoyed watching
my progress as much as I enjoyed sharing it.

Monday, August 8, 2011

Weekend Report

I wish I could say I accomplished everything I wanted to but its just too darn hot!  As someone pointed out to me recently, its so hot the trees are fighting over dogs.


Saturday I spent the day cutting more random strips for my spiderweb quilt. 
And while I was at it I cut 1 1/2" strips from the same fabrics for another scrap quilt. 


 All the strips are sewn together now and I'm cutting them into triangles now. 
I'm not sure how I'm going to lay them out yet but here is one option.


Yesterday I finally finished my Which Witch's Boot embroidery. 
And it looks fantastic if I do say so myself.  Next up is piecing it all together!


Oh...and last week I completed two more minis!  So now I have four minis needing quilting.


Back to the heat for just a moment...I know there are other places in the country that are experiencing higher temperatures right now but I need to whine for just a minute.  I promise to make it quick.

You'd think that after almost two months of 100+ degree weather I'd be used to it by now...but I'm not...not one little bit.  Being as our house is almost all windows with no shade trees and on a lake canal, its like living in a giant terrarium.  By mid afternoon our air conditioning struggles just to stay at 85.  We've had three days under 100 since mid June.  All this is making me very cranky.  Because really...who wants to quilt in a hot room with an iron going?  Not me!

I happy to report that yesterday I found a solution!  Let me introduce you to frogg togg's Chilly Pad!  Whoever designed this towel is a genious!


From frogg togg's website..."To the Chilly Pad is made from a hyper-evaporative material that retains water while remaining dry to the touch. When wet, the towel begins to evaporate and cool, providing cool, soft comfort to the user. When it stops cooling (about 1-4 hours, depending on conditions), you simply re-wet the towel in hot or cold water and wring it out. Within minutes, it's cool again."

Chilly pads are meant for staying cool while doing outdoor activities but let me tell you something.  They work great for keeping cool in a hot house while using an iron! 

And with that I'm off to go use my iron!

Till next time...

Friday, August 5, 2011

The Traveling Stash...

...has arrived at my house!  Last week I was contacted by Sue of Super Mom - No Cape! letting me know I was selected to be the newest recipient of the Traveling Stash which was started back in January by Nan of Pots and Pins.


From the box I took these goodies...a jelly roll quilt pattern, Starry Starry Night
and the solids that went with it, and the leftovers of a Halloween layer cake.


Into the box I am adding all this!  The fabric is 24 - 1/4 yard cuts of 
Folk Art Wedding Collection by Robin Pandolph for Moda plus 2 1/2 yards of background. 
The fabric was meant for a Jewel Box Quilt by Quilt in a Day but whoever
chooses it can do whatever they want with it. 


Now for the giveaway part!  The rules are simple. 
  1. You must have a blog to participate. 
  2. Due to shipping costs, you must live in the US (a flat rate priority box is the best way to go). 
  3. And you must agree to host your own giveaway with the Traveling Stash after you have taken what you want from the box and refilled it.
So if you're interested in receiving the Traveling Stash simply leave me a comment.  I'll select a winner next Thursday, August 11 via Random Number Generator and mail the Stash right away.

So who's in?