Later I was thinking about what my friend had said and it occurred to me that I don't know ANYONE that fussy cuts the way I do...that has blogged about it anyway. An online search for "fussy cutting shapes for English Paper Piecing" turned up different ways...but not my way.
What way you ask? That is what I am about to share with you.
Here's what you need:
- Fabric...usually a 1/4 yd is plenty but sometimes you can get away with an 1/8 yd
- Desired paper shapes...for this tutorial I'm doing hexagons
- Sewline Glue Stick
- And small scissors
It's just you and your light box...and some glue.
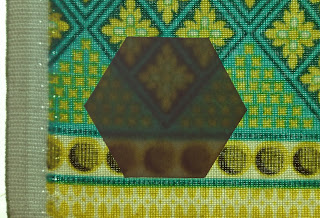
To begin lay your fabric face down on your light box and turn on the box. Now you can lay your hexi shapes over the different motifs in the fabric to see how they'll look when made. As you can see from the pictures below, you can easily see through the papers to select just the right motif.
Once you've selected the motif you wish to cut out, it's time to use your glue stick. Swipe a small dab of glue to the center of your hexi shape and position it over the desired motif and press in place. .
Repeat the process with the other five hexies, making sure to place them in the same position each time. When doing this, pay special attention to what the corners are matching up to and make sure to do it exactly the same way with each hexi.
The next step is to cut out your shapes with your scissors leaving around the shape to turn. A 1/4" is sufficient but you can get away with a little less if you have to.
The last thing you need to do is turn the edges for EPP. Using your glue stick again, light swipe the edge of your glue stick across the paper and turn the edge. You don't need a lot of glue to turn the edges. So do not to use the flat end of the glue stick...just the edge.
TIP: if you find that too much glue is coming off on the paper or getting
kinda "globby", stick it in the freezer for a few minutes. Trust me...it'll help.
Once your hexies are prepped, you can now play with their placement and select a fabric for the flower's center. Here is my first layout...
...and here is my final layout.
Usually when I'm working on hexies, I like to do several at the same time. Here are some others I did yesterday while working on this tutorial.
And they became these...
I hope y'all enjoyed this and found it helpful. I also hope that it wasn't old news! If you have a way that you think is easier I'd love to hear about it.
And if you decide to do it this way, let me know how it went.
Till next time...


22 comments:
Oh my goodness....that's ingenious. I love doing hexies and I'm certainly going to try this method with some fabric I have. Thanks for posting your method.
Karen
Beautiful! Thanks.
these look lovely! I'm doing hexies too and lately started glue basting mine again, how do you remove the glue once they are sewn together?
Great tutorial - I love EPP hexagons and you have a great eye for fabric placement. Thanks for the tips!
Wow, such a simple idea, but perfect for the job.
Easy peasy! Why hadn't I thought of that? Thanks for the tutorial.
Very sweet hexies! I haven't been bitten by that bug, but if I ever do get the 'bite' I will remember this. ;-) Have a happy day!
Amazing idea!! I can't wait to try this out with my hexies!
This was fantastic! Thanks for all the great pics, too!
I've never tried EPP- it looks like fun!
Thank you for explaining how you cut your hexies. Now to find a light box. Also I don't have glue.
Very well-written tutorial. Certain to inspire a lot of people.
That is AWESOME! But then you ALSO have excellent color AND design sense! Not sure mine'd look as good as yours do! Thanks for the tute!
Great tutorial and I would never have thought of doing them this way! Very clever.
OMG I would never have thought to do this! Thank you for sharing.
Wow, you sure do have a creative way of looking at hexagons and some wonderful fabrics. Very nice indeed.
this is the same way I fussy cut my hexies! Good to know I am not the only one who uses this method besides my mom who taught it to me.
Thank you so much for sharing this idea and technique! I've made about 600 hexies so far and was waiting until I reach 1,000 before deciding what I want to create. Until now I have been using scraps, but you make fussy cutting seem so easy. I can't wait to try this! Great tutorial!
I am just now discovering EPP and can't wait to try your method. THANK YOU for sharing!
This is a brilliant idea, Monica! Thank you for sharing it with us.
I loved this technique! Thank you.
So are you still basting the corners? Or just stitching them together? Your work is fabulous!
Post a Comment